
Spring is here! Thank goodness. We moved house this winter and I can’t wait to transform our weed-laden garden into something amazing for all the family. Craig and I have been busy planning this since January, and it’s just about time to don the gardening gloves and turn it into a reality. By summer we’ll have it all zoned up; play area, dining (& drinking, naturally) area, and a mini allotment.
Yep, we’re going all ‘Good Life’ & creating a mini vegetable patch. We’re not the only ones either as growing your own veg is bang-on-trend at the moment. With the success of the intriguingly camp Big Allotment Challenge and soaring supermarket bills, more people than ever are investing in their garden and making it work it for them.
“I wish I could do this but my garden is the size of a postage stamp”
You don’t need acres of space to create a mini allotment in your garden, nor do you need to lose precious lawn space and dig out beds. In fact, many vegetables will thrive in pots, raised beds and zip-up greenhouses, meaning that even those with the smallest of spaces can grow their own. Creating your own raised beds needn’t cost the earth either - with plenty of reclaimed materials more than fit for purpose.
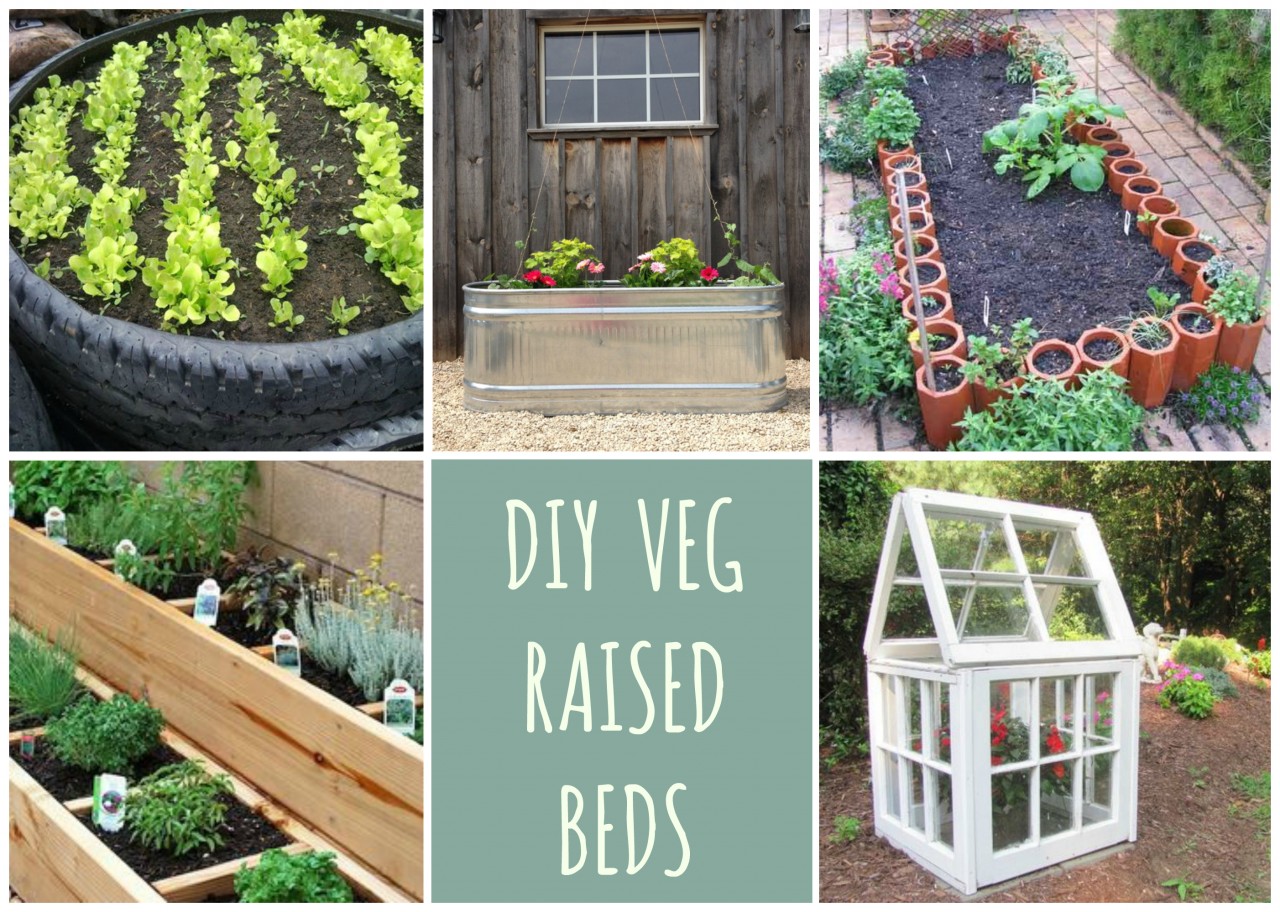 Raised bed creations made from used tyres, animal feeding troughs, terracotta pipes, reclaimed wood & old window panes.
“So what can I grow?”
Many vegetables that lend themselves well to container / raised bed cultivation. Here are three of the most popular to get your mini allotment off to a flying start!
Tomatoes
Many varieties of Tomato plants love a good pot. Ideally you’ll sow your seeds 8-10 wks before the last frost, so most of us Brits will kick off seedlings indoors from mid to late March (sowing too early - January or February can result in weak & lack-lustre plants with a disappointing yield).
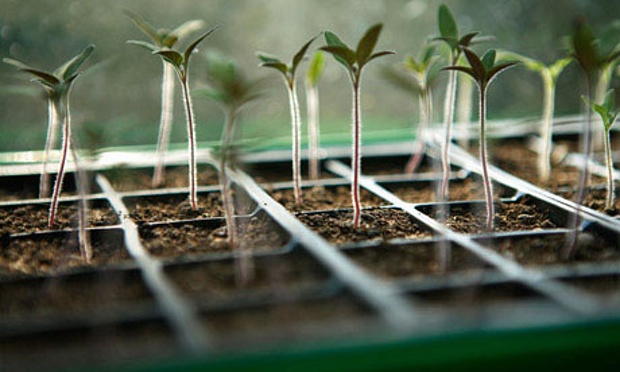
Simply fill a propagator pot with fresh seed and cutting compost. Make a small hole with your finger (some 3mm deep) and pop in a few seeds before covering lightly with compost. Place your pots in a tray then pop in a warm & sunny spot (windowsills are ideal). Leave propagator hoods off and water from below (so in the propagator tray) to reduce the threat of fungal disease and ensure your seeds aren’t disturbed.
When ready, transport your seedlings into bigger linear pots or a grow bag and introduce them gradually to the outdoors - allow them a few hours in the sun then seal overnight in a pop up greenhouse (or indeed, bring back inside) so they stay nice and warm. John Innes No1 compost is fab for potting-on as it contains the right mix of nutrients for young, immature and vulnerable plants. When the nights are warmer keep pots and containers outside so they get as much light as possible,

That’s about it really - the measure of your tomatoes will be good leaf growth rather than height. Don’t over-water them and keep out of direct sunlight during the hottest part of the day if leaves are looking dull and dry. Expect fruit between July & October.
Chillies
Aubergine, chilli and sweet pepper are all sown in the same way making them great colourful additions to your garden. They’re all incredibly hardy too so perfect for gardening novices.
To sow, simply fill a 7.5cm pot with seed compost and scatter seeds thinly on top - bear in mind they have a high germination rate so don’t put more than 3 in each pot. Cover with a fine layer of vermiculite, water then pop into a propogator tray (hoods on this time). After a week your seeds should start to appear, remove the propogator lid and leave it situ, watering lightly only when the compost begins to dry out.

When seedlings are about 2cm tall they can be moved to their own pot. Stick to 7.5cm pots until roots begin to protrude out of the bottom, then move into bigger 12cm pots filled with multipurpose compost. You want your plants to grow tall and strong so give them some support by staking with a small cane and securing with string. At the end of May plants can go out into the sun in their final container (5l pots are perfect) still secured to a cane. In hot weather you may need to water twice a day as they’re incredibly thirsty plants.
Fruits can be harvested between July and September when they reach full ripeness. Chilli peppers can be picked green or left longer to turn red.
Potatoes
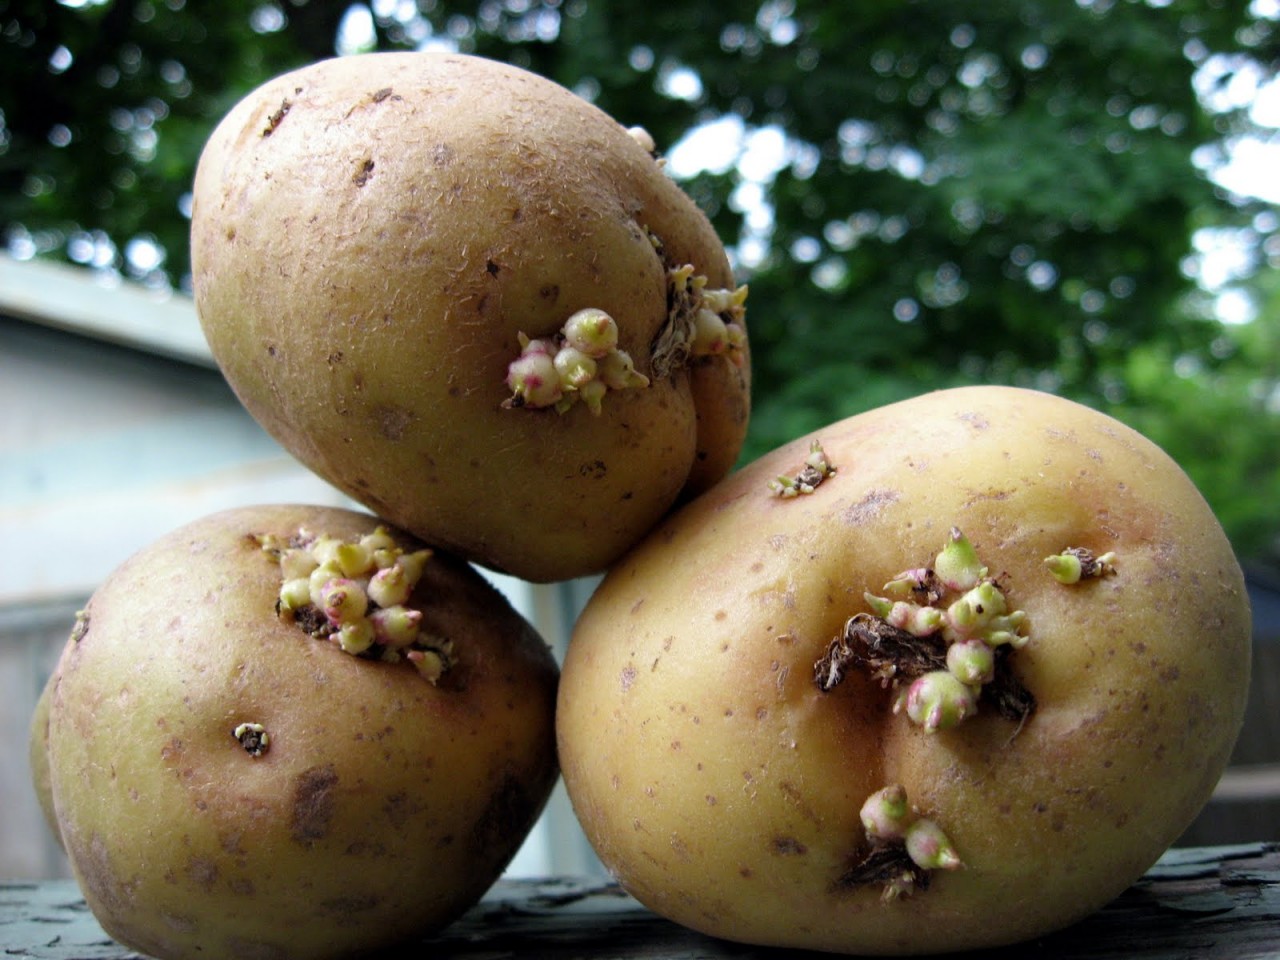
Potatoes simply love containers. This is good news as it also makes it easier to protect them from insects and weeds. They’re also a really fun project to grow with kids because potato plants grow incredibly quickly and most children enjoy eating them too.
You can grow these bad boys in just about any large container, but I’m a fan of fabric potato sacks as they’re environmentally-friendly, allow air to circulate and are porous so have plenty of natural drainage. Simply fill your container with 4-6 inches of potting soil and slow release fertilizer, cut your sprouting potato in half (ensuring you have at least two eyes on each piece of potato) and bed them down. The plants will grow fairly densely so four sprouting potatoes per sack is more than enough - trust me, you’ll be amazed how big your harvest will be. Add another 4 inches of high quality potting soil and fold down the sides of your sack so the top layer of soil gets plenty of sun.
Water well - for optimum growing conditions your soil needs to be moist, not wet. That said, make sure to water deeply, until water runs out the bottom - this is where drainage is absolutely key. I raise my sacks slightly immediately after watering to ensure the ground below isn’t acting as a plug.
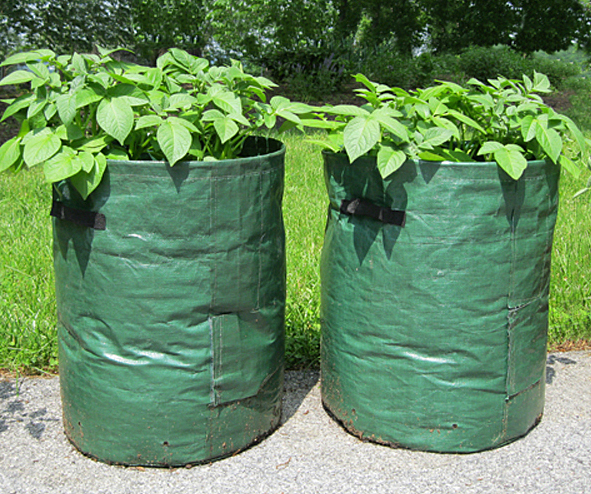
When your plants are around 6″ high, add a couple of inches of a soil and compost mix around your potato plants, covering approx 1/3 of the leaves with the mixture. You’ll want to repeat this process as your potatoes continue to grow. This is another reason why sacks are so brilliant as you can simply unfurl the sides as your plants grow taller - still keeping the bulk of your leaves in the sun.
You can begin to harvest potatoes any time after the plants have flowered - they look startling similar to daisies. Just carefully reach down into the soil of your container and pull out some potatoes, or wait until the flowers wilt and harvest the entire sack.